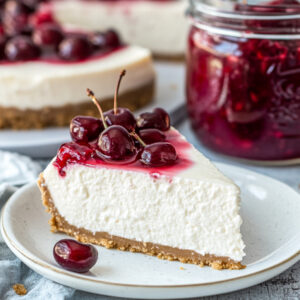
Perfect No-Bake Cheesecake
Ingredients
- Graham Cracker Crust
- 6 tbsp unsalted butter melted
- 1½ cups graham cracker crumbs
- ¼ cup granulated sugar
- Cheesecake Filling
- 16 oz cream cheese softened (2 blocks)
- 1 cup powdered sugar
- 1 tsp vanilla extract
- 1 cup heavy whipping cream cold
- 1 tsp cornstarch
Instructions
- Prepare the Crust
- The foundation of any great no-bake cheesecake lies in its crust. In a medium bowl, combine the melted butter, graham cracker crumbs, and granulated sugar using a fork. Mix thoroughly until the mixture resembles wet sand and holds together when pressed. The key is achieving the right moisture balance – too dry and the crust will crumble, too wet and it won’t set properly.
- Press the crumb mixture firmly into the bottom and approximately 1½ inches up the sides of a 9-inch pie plate or 8-inch springform pan. Use the bottom of a measuring cup or your fingers to create an even, compact layer. The sides should be slightly thicker than the bottom to provide structural support. Refrigerate the prepared crust while you work on the filling – this initial chilling helps it maintain its shape.
- Make the Cheesecake Filling
- The secret to an ultra-smooth no-bake cheesecake filling lies in proper technique and ingredient temperature. Using an electric mixer fitted with paddle attachment, beat the softened cream cheese on medium speed for 2-3 minutes until completely smooth and fluffy. Scrape down the bowl sides frequently to ensure even mixing.
- Add the powdered sugar and vanilla extract to the cream cheese, continuing to beat until the mixture is perfectly incorporated and free of lumps. The powdered sugar dissolves more easily than granulated sugar, creating a silkier texture that’s essential for no-bake desserts.
- In a separate, chilled bowl, begin whipping the cold heavy cream on low speed for about 1 minute. Add the cornstarch (which acts as a stabilizer), then increase the mixer speed to high. Beat for 3-4 minutes until stiff peaks form. The cornstarch prevents the whipped cream from deflating and helps maintain the cheesecake’s structure over time.
- Assemble and Chill
- The final assembly requires a gentle touch to preserve the airy texture you’ve created. Using a large rubber spatula, fold approximately one-third of the whipped cream into the cream cheese mixture to lighten it. Then, gradually fold in the remaining whipped cream using broad, gentle strokes from bottom to top. Avoid overmixing, which can deflate the cream and result in a dense texture.
- Spread the cheesecake filling evenly into the prepared crust, using an offset spatula to create a smooth, level surface. Cover with plastic wrap, ensuring it doesn’t touch the surface, and refrigerate for at least 4 hours. For optimal results, chill overnight – this extended setting time allows the flavors to meld and the texture to reach perfect consistency.
- Serve
- Before serving, let the cheesecake sit at room temperature for 10-15 minutes to make slicing easier. Use a sharp knife dipped in warm water and wiped clean between cuts for neat slices. Top with your favorite garnishes just before serving to prevent soggy toppings.
Notes
Pro Tip: Using room temperature cream cheese is crucial for achieving a smooth, lump-free filling. Remove it from the refrigerator 2-3 hours before starting, or soften quickly by placing sealed packages in warm water for 10-15 minutes.
Whipping Cream: Cold heavy whipping cream is essential for achieving proper volume and stability. If substituting with store-bought whipped topping, omit the cornstarch as it’s unnecessary.
Cream Cheese: Full-fat cream cheese provides the richest flavor and best texture. Light or reduced-fat versions contain more water and may prevent proper setting.
Graham Crust: Store-bought graham cracker crumbs save time, but homemade crumbs from 21 whole graham crackers pulsed in a food processor offer superior flavor and texture control.
Release Technique: If the crust sticks to your pan, briefly dip the bottom in hot water for 10-15 seconds to loosen it without melting the filling.
Freezing: This dessert freezes beautifully for up to 3 months. Wrap the set cheesecake tightly in plastic wrap, then aluminum foil. Thaw overnight in the refrigerator before serving.