
Bacon Cheeseburger Bombs
Missing the ultimate union of America’s favorite burger and comfort food ease? Your quest ends with Bacon Cheeseburger Bombs – the revolutionary recipe that’s taking kitchens by storm! These fantastic bite-sized bombs pack all the rich taste of a classic bacon cheeseburger into tidily wrapped, golden nuggets that explode in every bite.
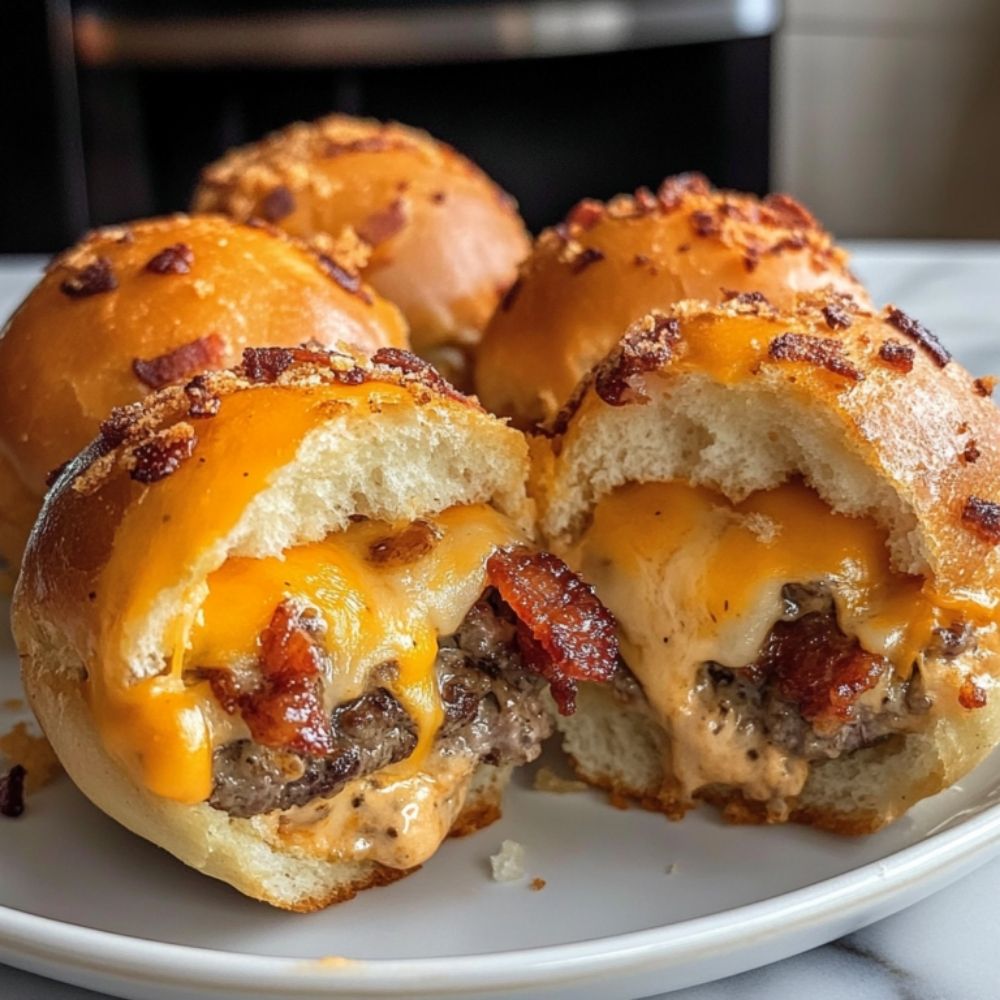
Imagine taking a large bite of buttery, flaky biscuit dough that gives way to a flavorful interior of seasoned ground beef, crispy bits of bacon, and melted cheddar cheese. These Bacon Cheeseburger Bombs are not just another appetizer – they’re a game-changing take on comfort food staples that transforms ordinary ingredients into extraordinary fare.
Whether you’re hosting a game day party, cooking up a family dinner, or just want to bring your meal prep A-game, these cheeseburger-filled bombs deliver restaurant-worthy flavor with home-kitchen convenience. The most wonderful part is their versatility: they’re just as happy as appetizers, main courses, or even grab-and-go snacks that can satisfy those long-held comfort food cravings we all love.
Ingredients List
Crafting the perfect Bacon Cheeseburger Bombs requires quality ingredients that work harmoniously together. Here’s everything you’ll need to create these flavor-packed delights:
For the Savory Filling:
- 1 pound ground beef (80/20 blend recommended for optimal flavor)
- 1 tablespoon olive oil
- 1 small onion, finely chopped
- 2 cloves garlic, minced
- ½ teaspoon salt
- ¼ teaspoon black pepper
- 1 tablespoon Worcestershire sauce
- ½ cup cooked bacon, chopped
For Assembly:
- 1 cup shredded cheddar cheese
- 1 (12-ounce) can refrigerated biscuits (8 biscuits)
- 1 egg, beaten (for egg wash)
- Optional: Sesame seeds for topping
Pro Tip: Choose high-quality ground beef with the right fat content (80/20) to ensure your bombs stay juicy and flavorful without becoming greasy.
Instructions
Preheat the Oven
Start your Bacon Cheeseburger Bombs journey by preheating your oven to 375°F (190°C). This temperature ensures even cooking and that perfect golden-brown exterior we’re after. Line a baking sheet with parchment paper or lightly grease it to prevent sticking and make cleanup effortless.
Prepare the Filling
Heat olive oil in a large skillet over medium heat. The key to exceptional cheeseburger bombs lies in building layers of flavor from the ground up. Add your finely chopped onion and minced garlic, sautéing until they become translucent and fragrant – approximately 2-3 minutes. This aromatic base creates depth that elevates the entire dish.
Next, add the ground beef, breaking it apart with a wooden spoon or spatula. Cook thoroughly until the meat is browned and no longer pink, typically 5-7 minutes. Don’t rush this process; properly browned beef develops complex flavors that make all the difference.
Drain any excess fat from the skillet, then stir in the Worcestershire sauce, salt, and black pepper. The Worcestershire adds that signature umami depth that makes these bombs irresistible. Finally, fold in the chopped cooked bacon and mix until everything is well combined. Remove from heat and let the mixture cool slightly – this prevents the cheese from melting prematurely during assembly.
Prepare the Dough
On a clean, lightly floured surface, gently flatten each biscuit into a thin round, approximately ¼ inch thick. Be careful not to overwork the dough; gentle handling ensures your bombs remain tender and flaky rather than tough.
Assemble the Bombs
This is where the magic happens! Spoon a generous portion of your beef mixture onto the center of each flattened biscuit – don’t be shy, but leave enough edge to seal properly. Top with a generous sprinkle of shredded cheddar cheese, creating that molten center that makes these bombs so special.
Carefully wrap the dough around the filling, pulling the edges together and pinching firmly to seal. The key is creating a tight seal while maintaining a round shape. Place each completed bomb seam-side down on your prepared baking sheet.
Add Finishing Touches
Brush the top of each bomb with beaten egg – this creates that beautiful, glossy golden finish that makes them look professionally made. If desired, sprinkle with sesame seeds for added texture and visual appeal.
Bake
Slide your masterpieces into the preheated oven and bake for 18-20 minutes, or until they’re gloriously golden brown and cooked through. The internal temperature should reach 160°F for food safety.
Serve
Allow your Bacon Cheeseburger Bombs to cool slightly before serving – the filling will be molten hot! Serve warm with ketchup, mustard, or your favorite dipping sauce for the complete experience.
Variations and Tips
Spice It Up: Transform your bombs into fiery delights by incorporating diced jalapeños into the beef mixture or swapping cheddar for pepper jack cheese. This variation adds a kick that spice lovers will appreciate.
Healthier Options: Substitute ground beef with ground turkey or chicken for a lighter alternative that doesn’t sacrifice flavor. You can also use whole wheat biscuits for added nutrition.
Flavor Experiments: Get creative with seasonings! Try taco seasoning for a Mexican twist, smoked paprika for depth, or Italian herbs for a Mediterranean flair. Each variation creates a completely different taste profile.
Cheese Adventures: While cheddar is classic, experimenting with different cheeses opens up endless possibilities. Mozzarella creates amazing cheese pulls, Swiss adds nutty complexity, and habanero cheese brings serious heat.
Serving Suggestions: These versatile bombs shine as appetizers at parties, work perfectly as main courses with a side salad, or even make excellent meal prep options that reheat beautifully.
Recipe Summary
Bacon Cheeseburger Bombs combine seasoned ground beef, crispy bacon, and melted cheddar cheese wrapped in flaky biscuit dough. Baked until golden brown, these portable comfort food bombs deliver restaurant-quality flavor in convenient, handheld portions perfect for any occasion.
Ready to create these incredible Bacon Cheeseburger Bombs? We’d love to hear about your cooking adventure! Try this recipe and share your feedback in the review section below or leave a comment on our blog. Don’t forget to subscribe for more delicious updates and creative recipe variations that’ll keep your kitchen exciting!
FAQs
Q: Can I prepare Bacon Cheeseburger Bombs ahead of time? A: Absolutely! You can assemble the bombs up to 24 hours in advance and store them covered in the refrigerator. When ready to bake, brush with egg wash and add a few extra minutes to the cooking time since they’ll be starting from cold.
Q: How do I store leftover cheeseburger bombs? A: Store cooled leftover bombs in an airtight container in the refrigerator for up to 3 days. Reheat in a 350°F oven for 8-10 minutes to restore crispiness, or microwave for 30-45 seconds for quick reheating.
Q: Can I freeze Bacon Cheeseburger Bombs? A: Yes! Freeze assembled, unbaked bombs on a baking sheet until solid, then transfer to freezer bags. They’ll keep for up to 3 months. Bake directly from frozen, adding 5-8 minutes to the original baking time.
Q: What’s the best way to prevent the bombs from opening during baking? A: The key is proper sealing technique. Make sure to pinch the dough edges firmly together and place seam-side down. Don’t overfill them, and ensure the dough isn’t too thin when flattening.
Q: Can I use homemade biscuit dough instead of canned? A: Certainly! Homemade biscuit dough works wonderfully and often tastes even better. Just ensure your dough has the right consistency – not too sticky or too dry – for easy handling during assembly.
Q: What dipping sauces pair best with these bombs? A: Classic choices include ketchup, mustard, and ranch dressing. For something special, try garlic aioli, chipotle mayo, or even a tangy barbecue sauce. The beauty is that any sauce you’d enjoy with a regular cheeseburger works perfectly here!

Bacon Cheeseburger Bombs
Ingredients
- For the Savory Filling:
- 1 pound ground beef 80/20 blend recommended for optimal flavor
- 1 tablespoon olive oil
- 1 small onion finely chopped
- 2 cloves garlic minced
- ½ teaspoon salt
- ¼ teaspoon black pepper
- 1 tablespoon Worcestershire sauce
- ½ cup cooked bacon chopped
- For Assembly:
- 1 cup shredded cheddar cheese
- 1 12-ounce can refrigerated biscuits (8 biscuits)
- 1 egg beaten (for egg wash)
- Optional: Sesame seeds for topping
Instructions
- Preheat the Oven
- Start your Bacon Cheeseburger Bombs journey by preheating your oven to 375°F (190°C). This temperature ensures even cooking and that perfect golden-brown exterior we’re after. Line a baking sheet with parchment paper or lightly grease it to prevent sticking and make cleanup effortless.
- Prepare the Filling
- Heat olive oil in a large skillet over medium heat. The key to exceptional cheeseburger bombs lies in building layers of flavor from the ground up. Add your finely chopped onion and minced garlic, sautéing until they become translucent and fragrant – approximately 2-3 minutes. This aromatic base creates depth that elevates the entire dish.
- Next, add the ground beef, breaking it apart with a wooden spoon or spatula. Cook thoroughly until the meat is browned and no longer pink, typically 5-7 minutes. Don’t rush this process; properly browned beef develops complex flavors that make all the difference.
- Drain any excess fat from the skillet, then stir in the Worcestershire sauce, salt, and black pepper. The Worcestershire adds that signature umami depth that makes these bombs irresistible. Finally, fold in the chopped cooked bacon and mix until everything is well combined. Remove from heat and let the mixture cool slightly – this prevents the cheese from melting prematurely during assembly.
- Prepare the Dough
- On a clean, lightly floured surface, gently flatten each biscuit into a thin round, approximately ¼ inch thick. Be careful not to overwork the dough; gentle handling ensures your bombs remain tender and flaky rather than tough.
- Assemble the Bombs
- This is where the magic happens! Spoon a generous portion of your beef mixture onto the center of each flattened biscuit – don’t be shy, but leave enough edge to seal properly. Top with a generous sprinkle of shredded cheddar cheese, creating that molten center that makes these bombs so special.
- Carefully wrap the dough around the filling, pulling the edges together and pinching firmly to seal. The key is creating a tight seal while maintaining a round shape. Place each completed bomb seam-side down on your prepared baking sheet.
- Add Finishing Touches
- Brush the top of each bomb with beaten egg – this creates that beautiful, glossy golden finish that makes them look professionally made. If desired, sprinkle with sesame seeds for added texture and visual appeal.
- Bake
- Slide your masterpieces into the preheated oven and bake for 18-20 minutes, or until they’re gloriously golden brown and cooked through. The internal temperature should reach 160°F for food safety.
- Serve
- Allow your Bacon Cheeseburger Bombs to cool slightly before serving – the filling will be molten hot! Serve warm with ketchup, mustard, or your favorite dipping sauce for the complete experience.